Adding a QCT Phantom
Aim
The aim of this article is to describe how to enter a new phantom in the UNITY platform and how to edit an existing one.
Procedure
Step 1: To insert a new phantom in the system, please go to the menu item “Add/Edit QCT Phantom”.

Step 2: Now a site can be chosen to which thephantomneeds to be assigned. Before the actual phantom (with the serial number) can be entered, a phantom type must be selected (manufacturer, number of rods and their concentrations). A Phantom can only be assigned to one site, but a phantom type can be chosen for all sites in a study.

Step3: Click on “Add/Edit Phantom Type”.
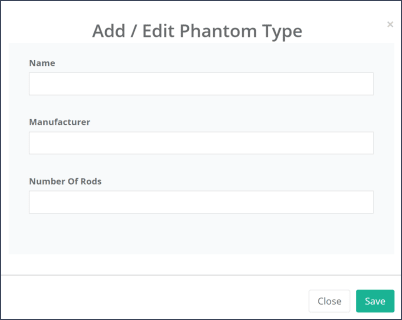
Step 4: Click on “Create New Phantom Type”. Note that after a phantom type is created, it is possible to edit it by selecting the desired phantom type from the drop-down list.
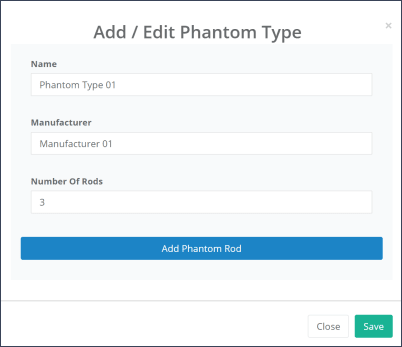
Step 5: Once the “Number of Rods” is chosen, a blue button “Add Phantom Rod” will be available. Click on it to display the “Value” field for each rod.
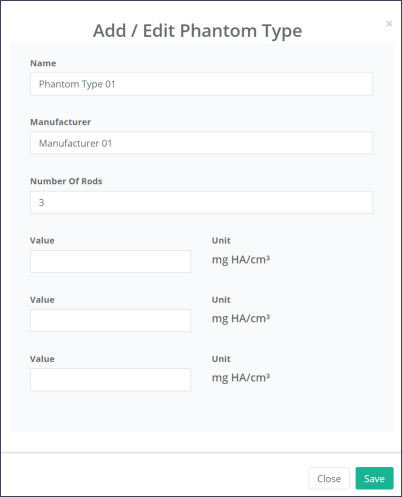
Step 6: This step needs to be repeated until all given “Number Of Rods” have one “Value”. Example: if “number of Rods” was entered as 3, three “Values” need to be entered, otherwise it will not be possible to save this phantom type.
Step 7: A phantom type is now saved in the database. The next step is to add a phantom. If a clinic was not chosen on step 2, it is necessary to choose one now.
Step 8: Once a site is chosen, the blue button “Add Phantom” is displayed. Click on it to enter the information for this specific phantom.
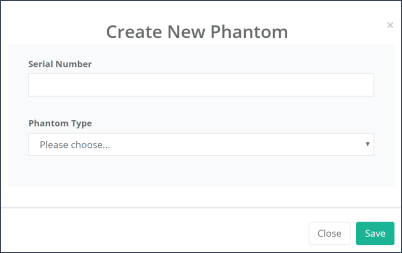
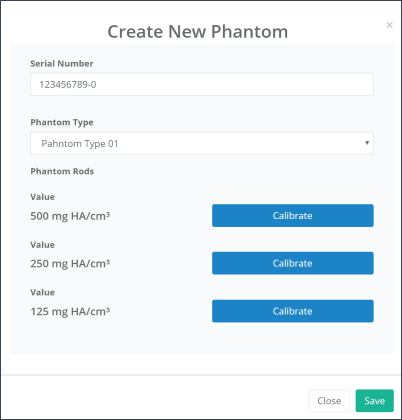
Step 9: When the phantom type is chosen from the drop-down list, the values saved for this phantom type are displayed. To enter a calibration value, click on “Calibrate” and then enter the calibrated value. Click on “Save” to save this phantom in the database.
Step 10: The phantom is saved for this clinic. To edit the phantom, click on the blue “Edit” button that appears on the right side of the table in the “Action” column. Remember to save any changes you make to the phantom.

Step 11: All saved phantoms are displayed in a table. They are now available for BMD measurements when uploading medical images under the menu item “Upload and Measure Images”.

Updated on 13 Sep 2023
