Anonymization of images
Aim
The aim of this article is to explain how to anaonymize and therefore erase patient identifying information from DICOM images before uploading the images into the database. Please note that we can only upload anonymized images into our database to comply with dataprotection regulation under HIPPA and GDPR.
General Information
It is the responsibility of the uploading person to only provide anonymized DICOM images. Images that have not been anonymized will not be imported into the database.
In case the DICOM images contain burnt-in annotations that couldn’t be removed at point of generating the images, the DICOM Image Manager provides an “Erase Pixels” function for manual anonymization.
Procedure
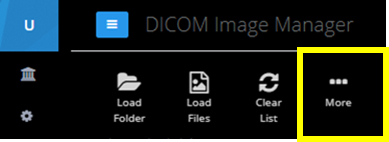
Step 1: After a successfully uploading the respective DICOM image to the DICOM Image Manager, you can click on the icon “More” to enlarge the tool menu.

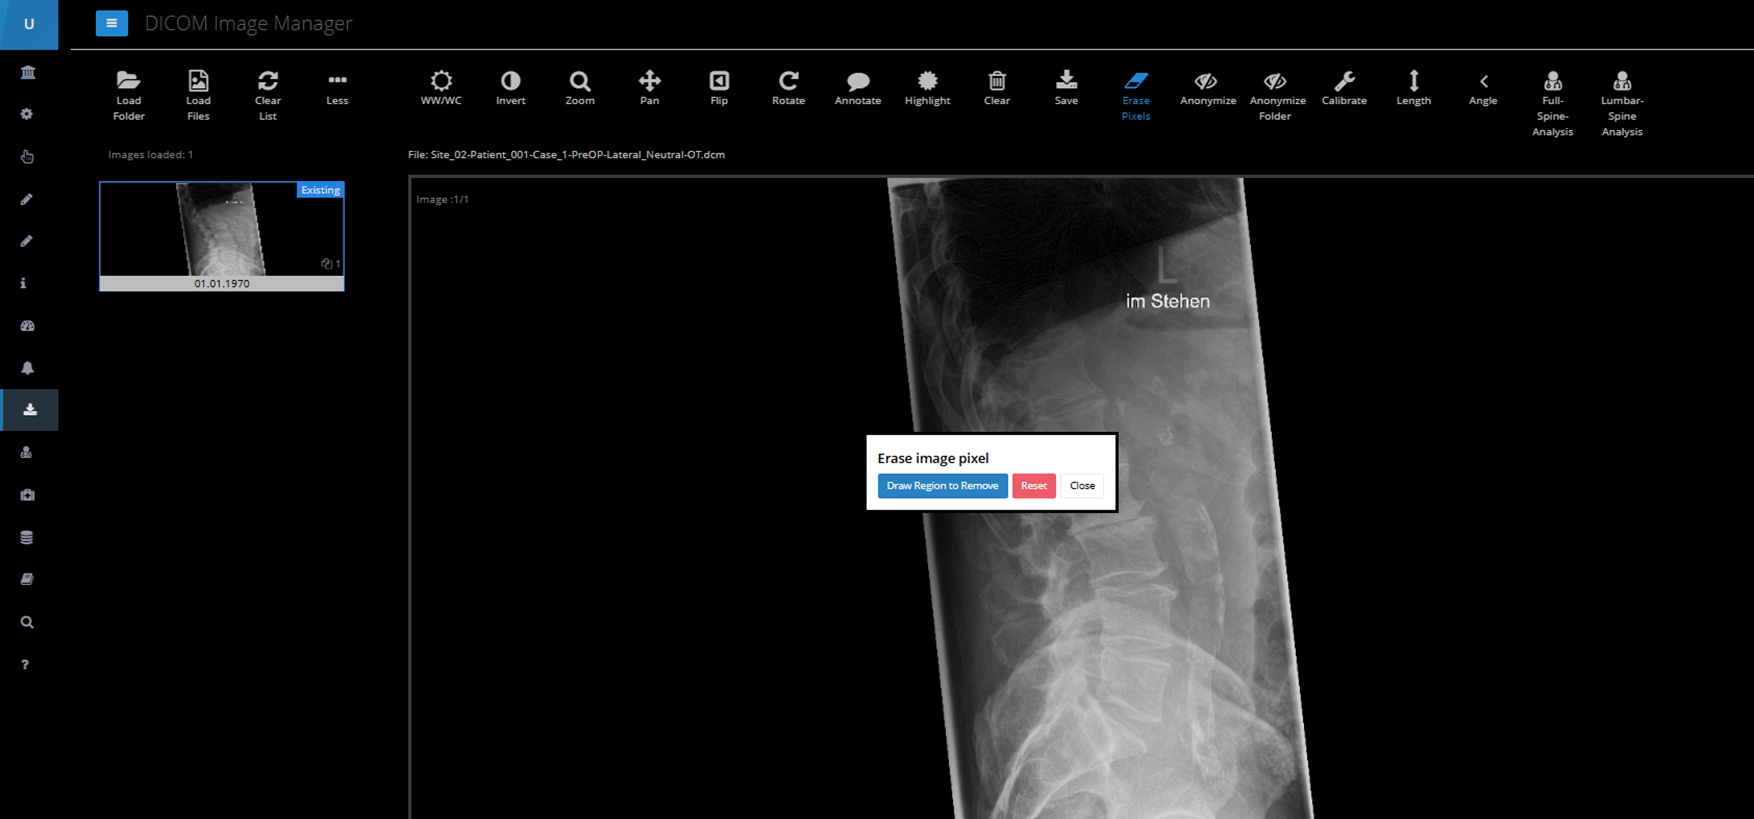
In the enlarged tool menu you can find the “Erase Pixels” function, which you can use to remove image sections that might contain patients details that cannot be uploaded into the database.

Step 2: By clicking the icon, a dialoge window will open. To proceed click “Draw Region to Remove”.

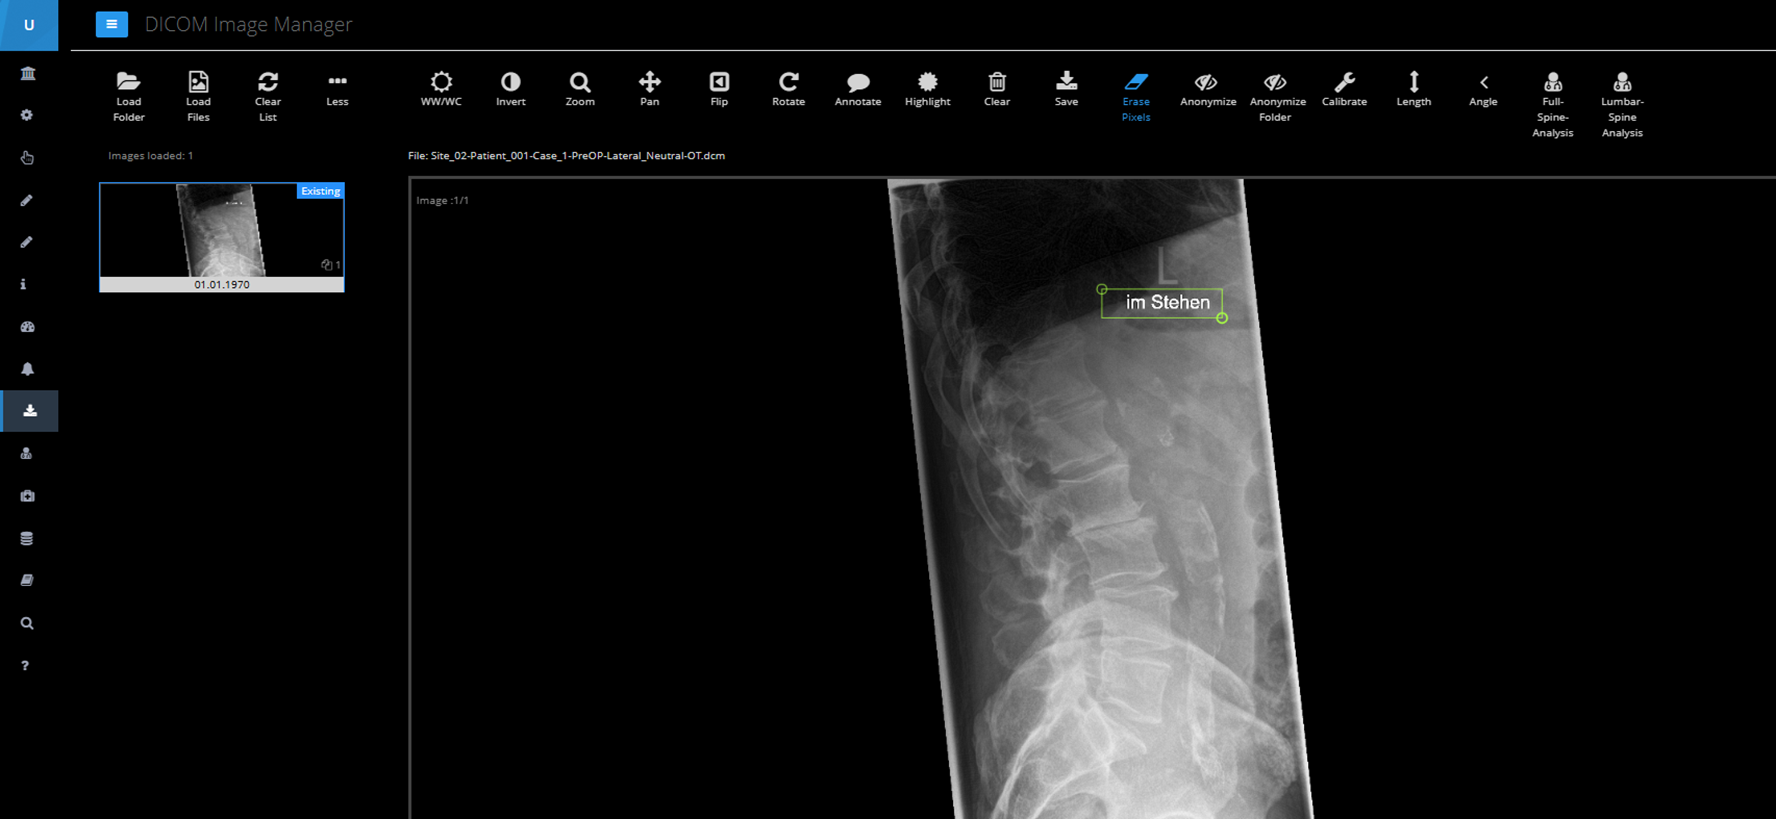
You may now select the region in which the pixels shall be erased using your mouse cursor by click and holding your primary mouse key.

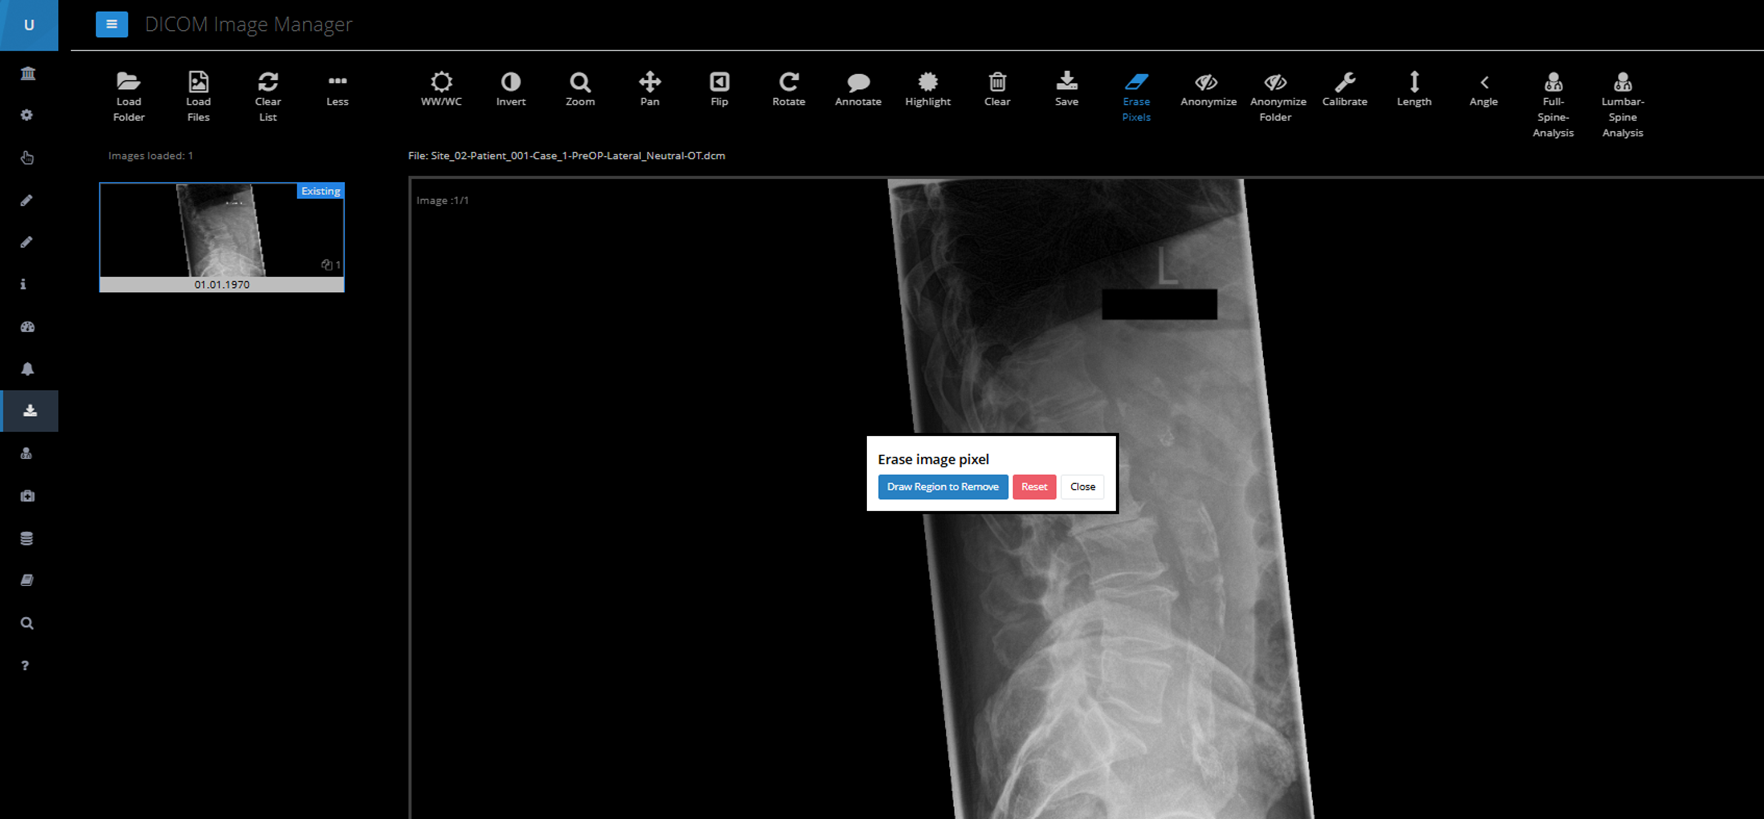
After releasing the mouse key, the selection will become black indicating the successful erasure of pixels.

You can close the dialog and proceed to upload the successfully anonymized DICOM image into the database, as described under “Upload of medical images”.
Please note: Each region must be drawn separately for each image uploaded. Please check all images to ensure that no patient details are visible.
Updated on 07 Feb 2025
