Managing study documents
Aim
This article explains how to upload documents to the RAYLYTIC Platform and share them with other users.
General Information
Before uploading documents to the RAYLYTIC Platform and sharing them with other users, please make sure that all users involved have the appropriate permissions. Users who upload and share documents need the “Document Write” permission. Users with whom the documents are shared need the “Document Read” permission.
Procedure
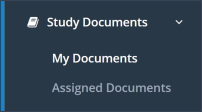
Step 1: After successful login to the RAYLYTIC platform, please select the corresponding study under “Studies”. Then click on “Study Documents” in the main menu on the left side of the screen and select the sub-item “My Documents” (Figure 1).

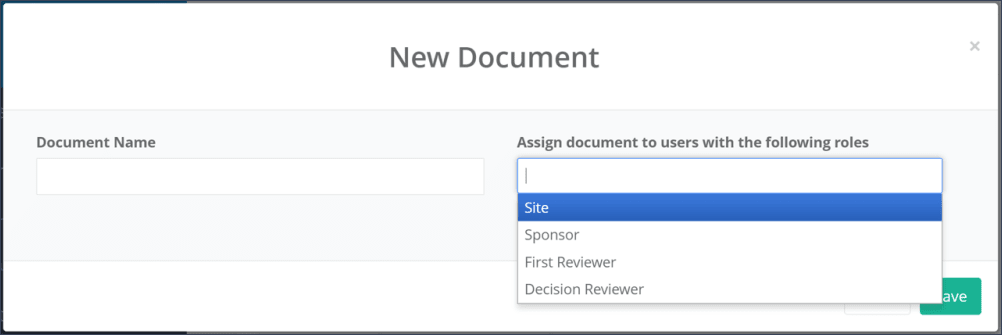
Step 2: The RAYLYTIC Platform differentiates distinct versions of the same document, and each version is allowed a different description. To upload a new document, click on “New Document” enter Document Name and the user type to which the documents will be assigned (Figure 2).

You can choose between:
Site
Sponsor
First Reviewer
Decision Reviewer

This field can be edited again later.
Step 3: Click on the blue “New Version” button and enter the information relevant to the current version.

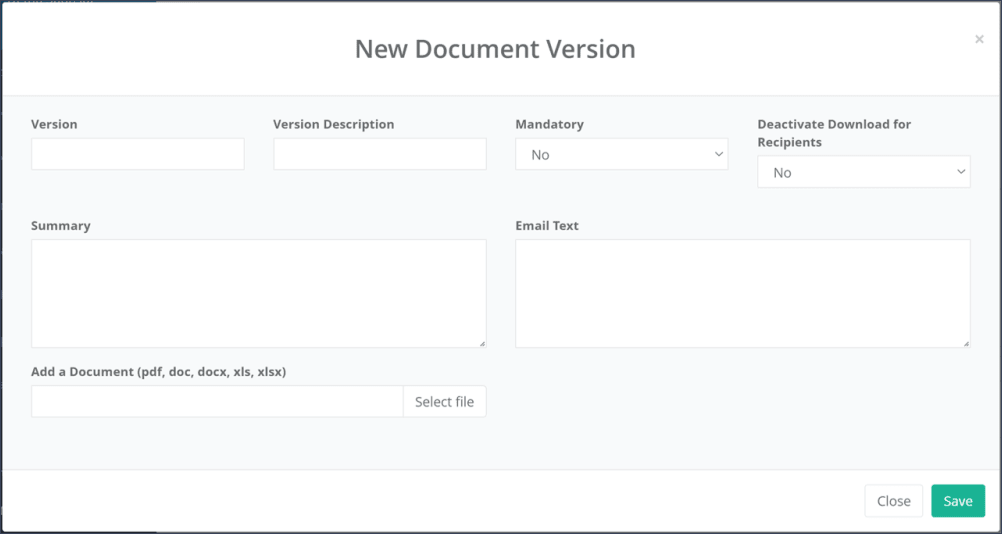
Now you can enter the version (number or name), a small description of the version (e.g., Draft) and a summary of the document or the changes made (in case an older version already exists) (Figure 3).

Step 4: The field “Mandatory” refers to users who need to confirm having received the document. If set to “Yes” these users will not be able to perform any activities in the RAYLYTIC platform before confirming it first**.**
Step 5: The field “Deactivate Download for Recipients” deactivates the download of the uploaded document by any users. This is useful for making sure that only the latest version of a document will be downloaded.
Step 6: Click on “Select file” and choose the document you want to upload from your local computer. Then save.
Once you uploaded a document, it will appear in the following table:

In the column “Document Name” you will find the buttons “Edit” and “Manage users”. By clicking on “Edit”, you can edit name and the user role. Click on “Manage Users” to add or remove users from the recipient’s lists. Users can be dragged to the “Inform only” or to “Need to confirm”. Users under “Inform only” will only receive and will be able to download the file directly from the e-mail (blue “Download” button) or from the RAYLYTIC platform (under the menu item “Assigned Documents”. Users under “Need to confirm” need to confirm the document in the RAYLYTIC platform. This confirmation can be mandatory or not and is configured for every version as described on step 4. Click on “Save”.
Step 7: In the column “Versions” you can see the version of the document and to whom the document is assigned. To edit, click on the pencil icon.
Step 8: Click on “Assign & send e-mails to users” to send an e-mail to all selected users to inform them about the upload of a new document version.
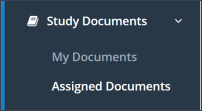
Under Study Documents -“Assigned documents” (Figure 5), you can see which documents you can access yourself. You can download them by clicking on “Download”.

Updated on 13 Sep 2023
