Monitoring Questionnaires
Aim
The aim of this article is to describe how to perform the verification of completed questionnaires in the RAYLYTIC Platform.
Procedure
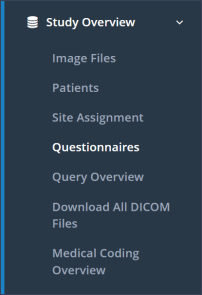
Step 1: The menu section “Study Overview” and subsection “Questionnaires” has to be selected (Figure 1).
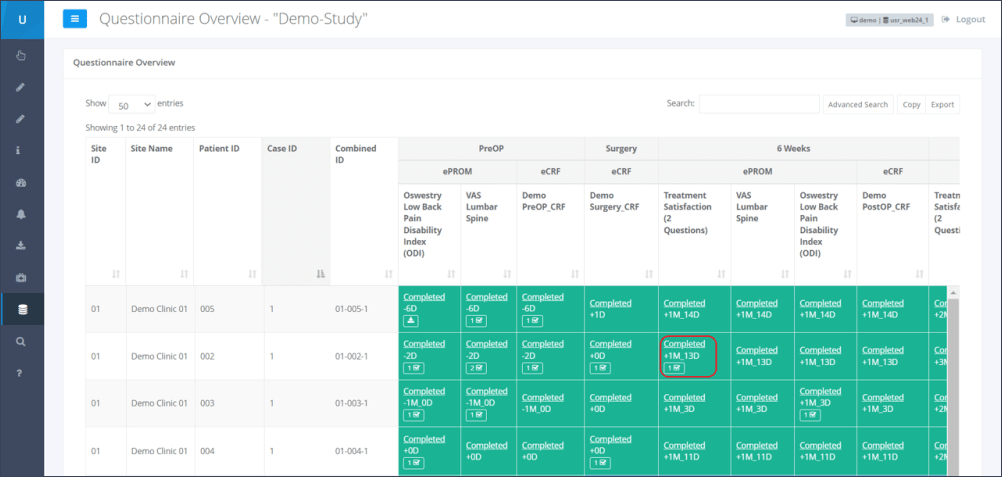
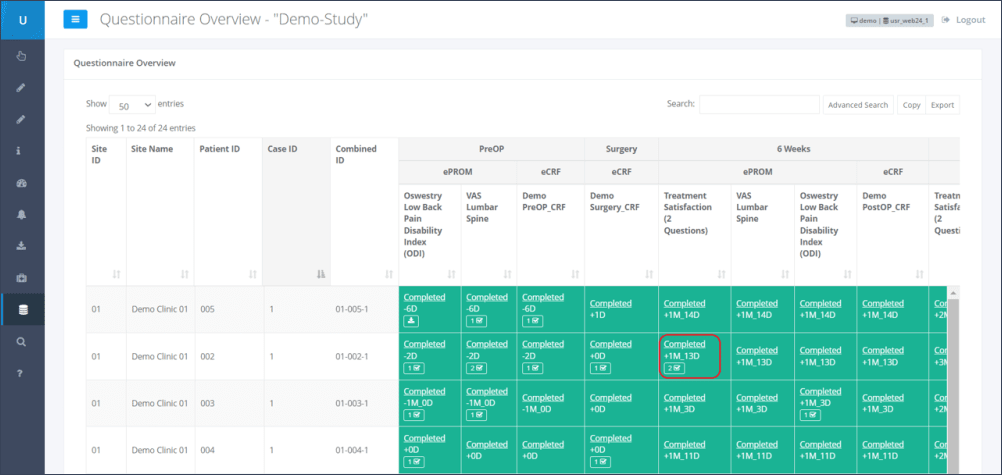
Step 2: By clicking the underlined “Completed” for the corresponding patient and time point, the questionnaire results which need to be verified will be opened (Figure 2).
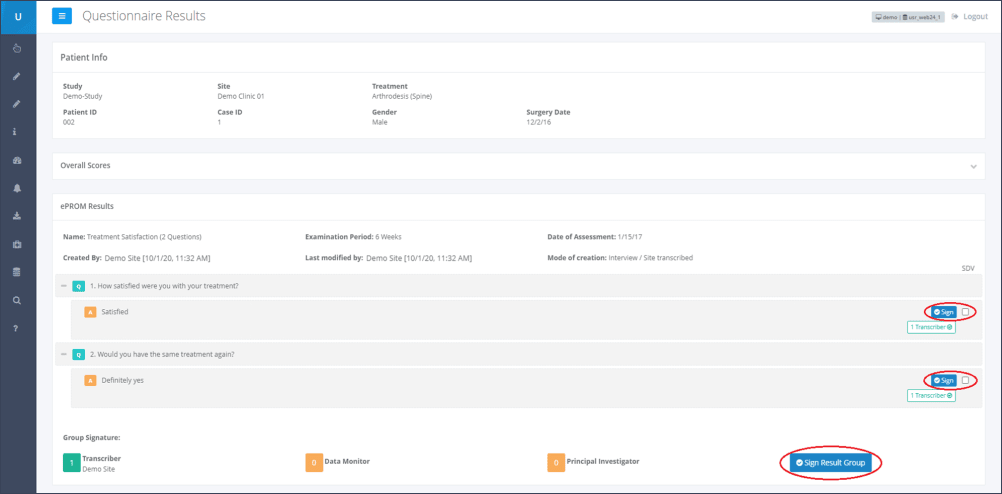
Step 3: Below each overview of a questionnaire’s result, the users responsible for verifying (highlighted in Figure 3), are listed:
Transcriber: This is a clinic user who electronically signs that the data entered is complete and accurate.
Data Monitor: This is a sponsor user with the special permission “Data Monitor” (usually a Clinical Research Associate). The Data Monitor is responsible for matching the entered data to the patient’s source data. By electronically signing this questionnaire, the Data Monitor confirms that the data entered is accurate and matches the source data.
Principal Investigator: This is the site user who is the person in charge of the site. This person must add the final signature.
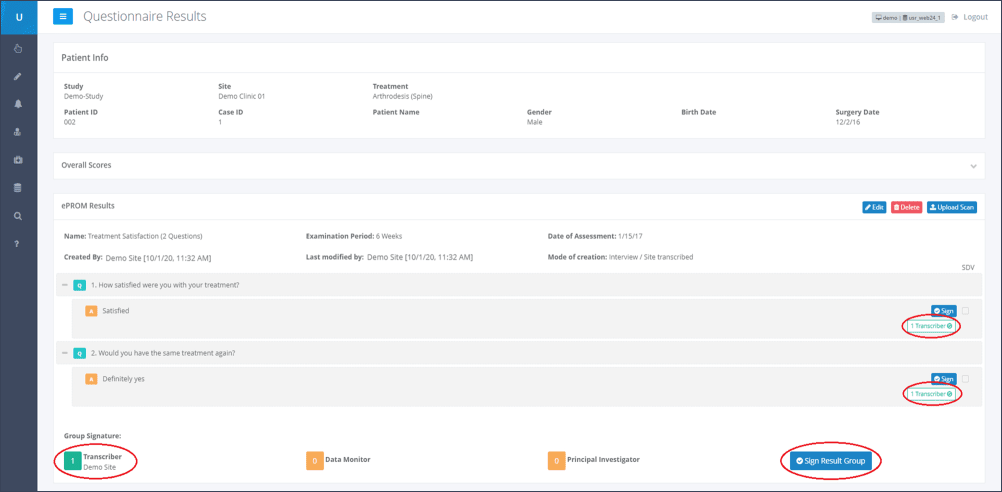
In this example, Figure 3 shows that the “Transcriber” has already checked the entered data for completeness and signed it electronically. This is displayed at the bottom of the page, below the heading “Group Signature”. Here a green “1” is displayed next to the “Transcriber”. Additionally the note “Transcriber” is displayed next to each answered question in the result overview. Next to the “Data Monitor” and the “Principle Investigator” fields, a yellow “0” is displayed, which means that they have not signed the form yet.
Step 4: After verification of the entered data with the applicable source data, the Data Monitor shall confirm the correctness. This can be done by clicking on the corresponding dark blue “Sign”-button next to each data entry. This will create the e-signature.
Transcriber and Data Monitor can confirm each single line, or the whole form by clicking on the blue “Sign Result Group”-button at the end of the eCRF/ePROM.
Step 5: Once a Data Monitor has e-signed the eCRF/ePROM this status will be shown next to each question and at the bottom of the page underneath the heading “Group Signature” (Figure 4).
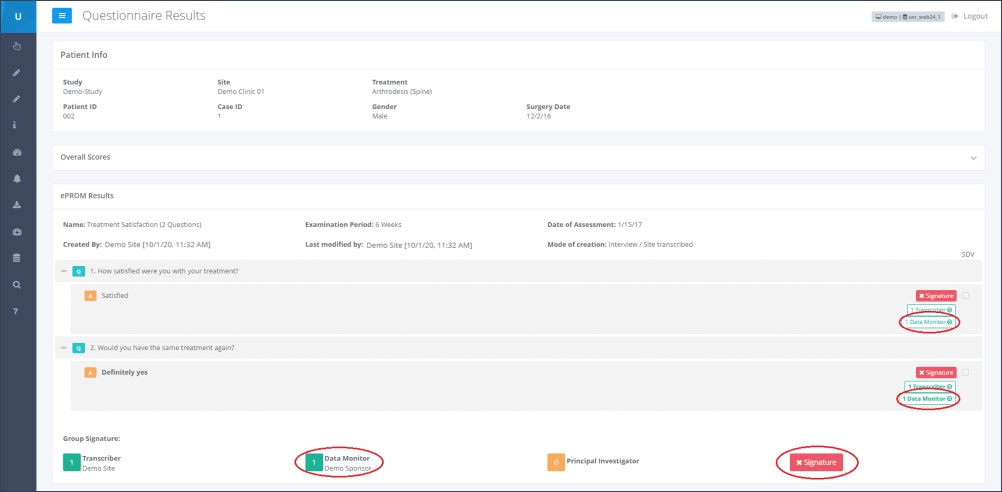
Transcriber and Data Monitor are also able to de- and re-sign single answers, or the whole form, by clicking on the corresponding buttons once more.
After the Data Monitor’s signature has been added, the number of e-signers changes from “1” to “2” under the “Completed” questionnaire within the “Questionnaires” overview (Figure 5).
Sign all completed questionnaires at once
Users who are authorized to sign in the RAYLYTIC platform also have the option to sign all completed questionnaires of a patient at once. To do this, navigate in the “Questionnaire Overview” to the specific patient for whom you want to sign all completed questionnaires. In the “Case ID” column, there is a blue “Sign” button under the case number. If you click this button, the signature will be added to each completed questionnaire.
Source Data Verification
Only users with the permission “Data Monitor” are allowed to perform source data verification (SDV) on the RAYLYTIC Platform.
Step 1: Again, a completed questionnaire has to be accessed after selecting the menu section “Study Overview” and subsection “Questionnaires”, as described above.
Step 2: After opening the questionnaire results, the Data Monitor can tick the equivalent boxes next to the answers that should be verified. For signing each answer separately, the blue labeled “Sign” button next to the answer can be clicked. If all answers are to be verified, all SDV boxes must be checked. To sign all answers at once, the “Sign Result Group” button can be used (Figure 6).
Updated on 13 Sep 2023
