Query Management
Aim
Queries can be used to point out discrepancies as well as inconsistencies in questionnaires (eCRFs and ePROMs) by a sponsor user to a site user, which are detected during verification of the data in the study database against the source documents.
The purpose of this article is to describe how to create and manage queries to questionnaires in the RAYLYTIC Platform as a sponsor user and site user.
Additional permissions are qualifying sponsor and site users to create and to manage queries. These additional permissions are:
“Open Query” – Creation of a query
“Answer Query” – Reply to a query
“Resolve Query” – Closure of a query; no further changes or clarifications to data entries will become applicable
A sponsor user can be equipped with each of these additional permissions, a clinic user can only be assigned the permission “Answer Query”.
Procedure
Create, Answer and Resolve a Query
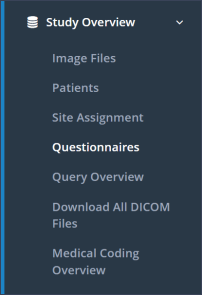
Step 1: To create a query, please first select the corresponding study under the menu section “Studies”. Then the menu section “Study Overview” and subsection “Questionnaires” has to be selected (Figure 1).
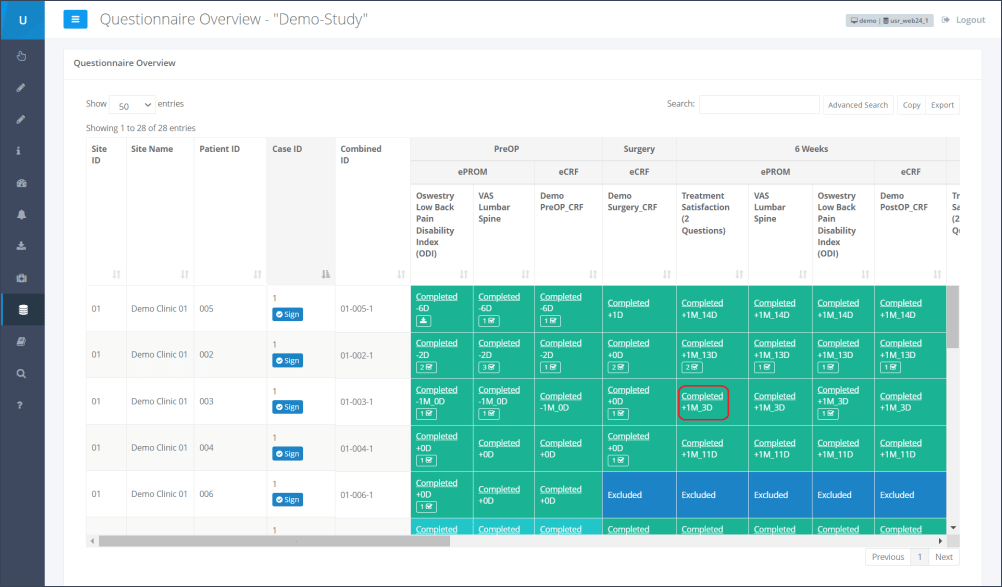
Step 2: By clicking the underlined “Completed” for the corresponding patient and time point, the questionnaire results which need to be verified will be opened (Figure 2).
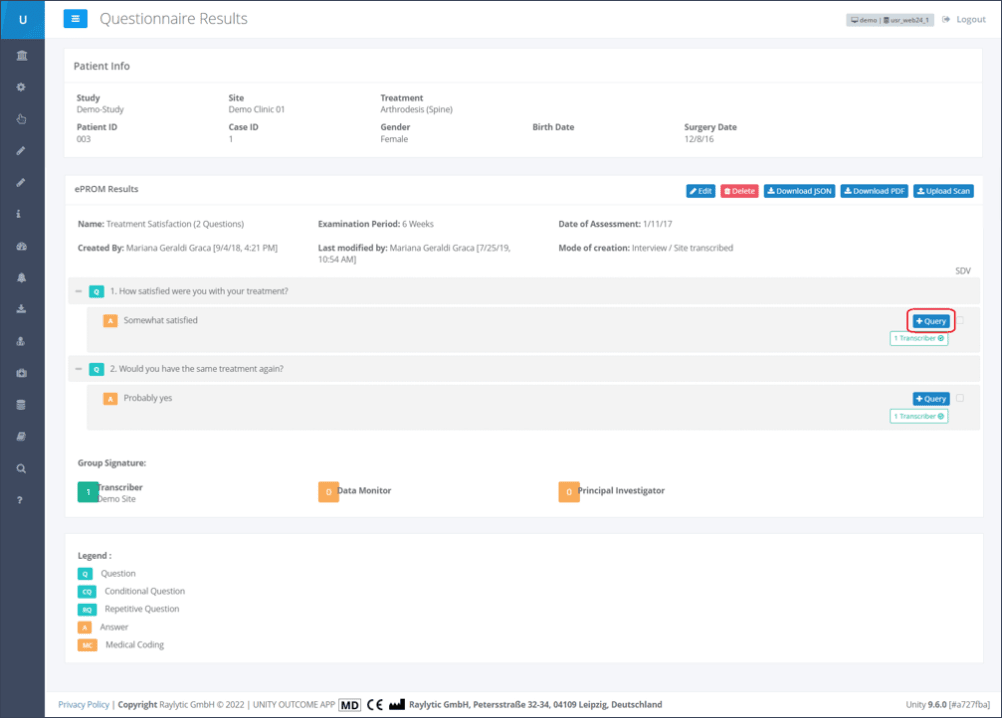
Step 3: For creating a query, the blue colored button “Query” on the right side of a respective question and answer (Figure 3) has to be clicked on and the window “Create Query” is opened.
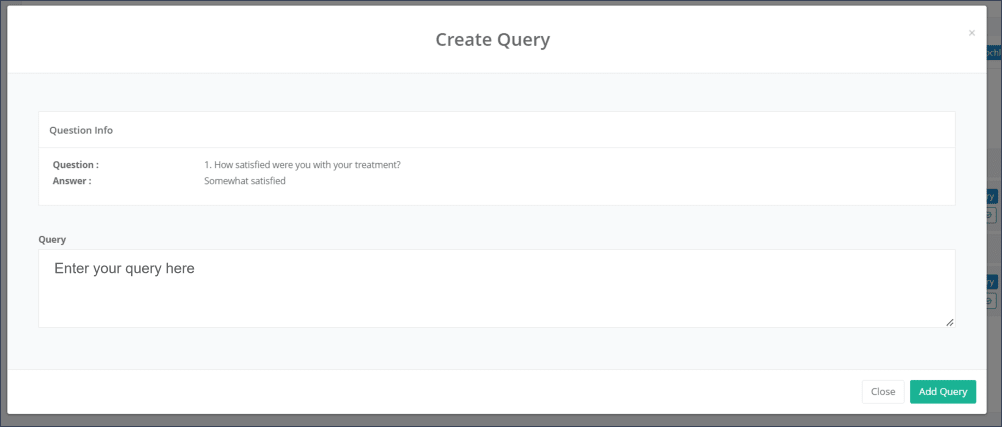
Step 4: In order to get the discrepancy or inconsistency in the data checked by the site, a query text or message has to be entered in the free text field “Query”. By clicking on the green labelled button “Add Query”, the query message will be created and saved in the study database (Figure 4).
Step 5: The created query will be marked as a yellow icon “Query” with an eye symbol (Figure 5). This icon is appearing next to the corresponding question and answer at the Questionnaire results overview.

Please note: Only a sponsor user with the additional permission “Open Query” is allowed to create a query.
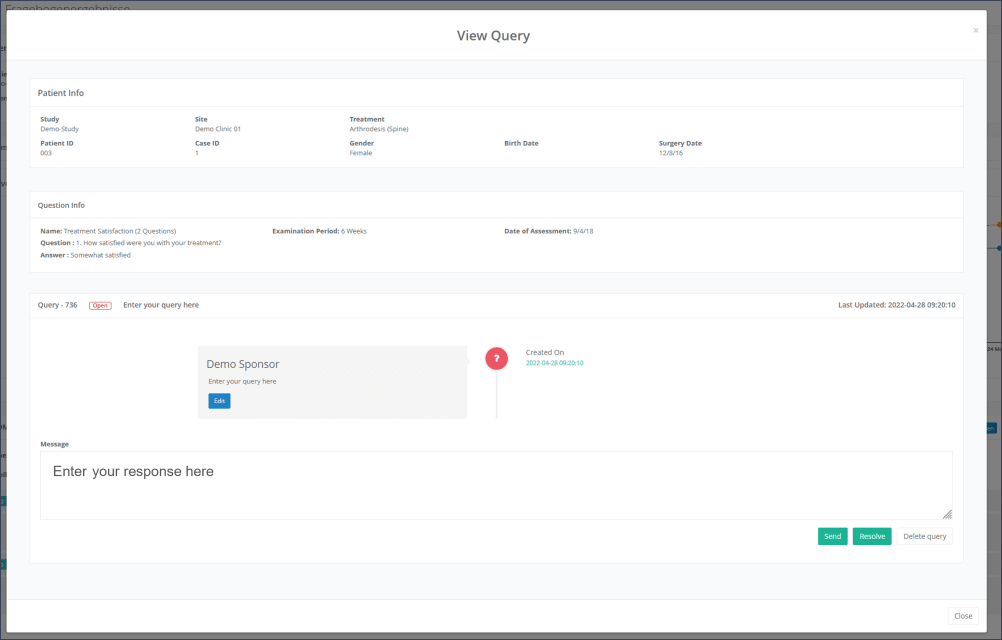
Step 6: For Answering a query, the yellow-colored icon “Query” has to be clicked and the window “View Query” is opened. The response to a query has to be entered in the free text field “Message” and submitted by clicking on the green-colored button “Send” (Figure 6). The saved response to the query will then be displayed in the chat history at the right-hand side at the “View Query” window (Figure 7).
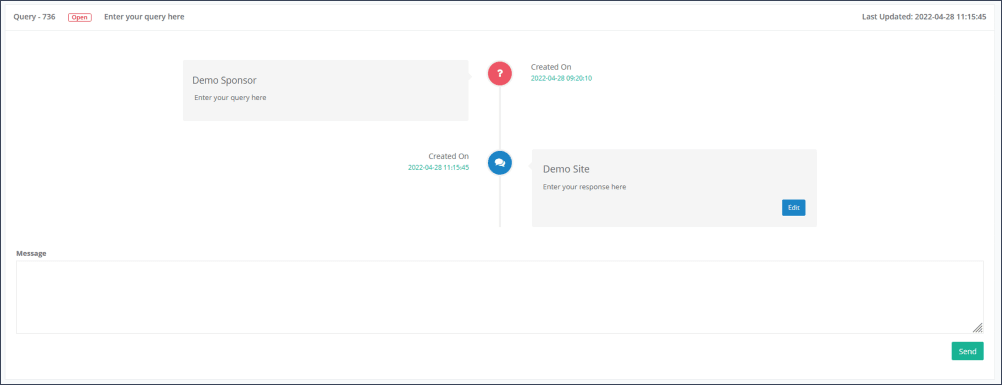
Step 7: To accept the response to the related query and resolve it, an answer to the query needs to be entered in the free text field “Message” and the green colored button “Resolve” has to be selected. The query will then be defined as resolved (Figure 8).
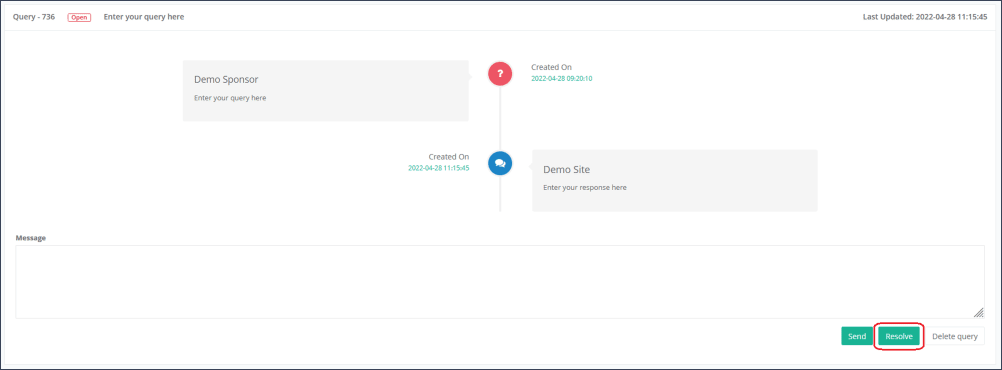
Step 8: If a query was created by error or for testing reasons, a sponsor user is able to delete a specfic query. To do this, you must enter a message in the text field, but instead of clicking the “Resolve” button, you click the white “Delete Query” button (Figure 8). The query in question is then defined as “Closed”.
After refreshing the Questionnaire result overview, the resolved or closed query will be displayed as a blue-labelled icon “Query” with an eye symbol and is appearing next to the corresponding question and answer.
Please note: Only a sponsor user with the additional permission “Resolve Query” is allowed to resolve/delete a query.
Query Overview
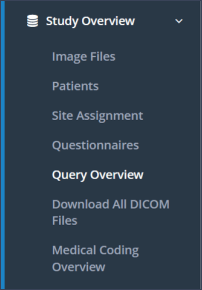
An overview of all queries and their different status within a study can be accessed under the menu section “Study Overview” and subsection “Query Overview” (Figure 9).
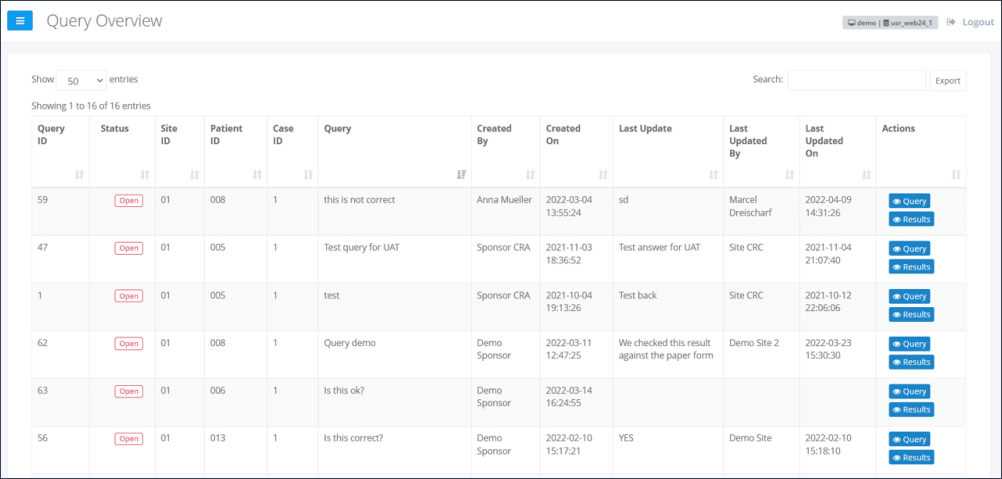
The “Query Overview” is listing “Open” queries which are colored red, and “Resolved” queries are displayed in green. Queries with the status “Closed” are marked in gray color (Figure 10).
Definition of the Query status:
“Open" – A query was created by a sponsor user. The query is still activated for clarification of the discrepancy or inconsistencies.
“Resolved" – A query was resolved by a sponsor user. No further actions to data and/or no further responses to this query by a site user are applicable.
“Closed” - If a query was created by error or for testing reasons, a sponsor user is able to close this specfic query.
It is also possible to answer to and to resolve “Open” queries through the subsection “Query Overview”. The blue-colored buttons “Query” and “Results” each with an eye symbol in the column named “Actions” can to be used for the query management (Figure 10).
Icon “Query” with an eye symbol – Redirection to the window “View Query” including the chat history between sponsor and site user. By using this option, the steps 3 to 7 as itemized under chapter “Create, Answer and Resolve a Query” are to be considered.
Icon “Results” with an eye symbol – Redirection to the respective questionnaire and corresponding Questionnaire Result Overview.
Please note: No emails will be sent to draw attention to new or existing queries. The current status of all queries can be reviewed at any time in the study database under the menu section “Study Overview” / subsection “Query Overview”.
Updated on 15 Feb 2022
